With Black Friday and Cyber Monday behind us and the upcoming holidays upon us, some of you may be getting a new external hard drive(s) for your Mac or Windows system(s). I wanted to write up a guide on how to format your drive into exFAT, the format that is well supported and ideal for many cases.
The Benefits of exFAT
A few years ago, I wrote about how hard drives marketed to Apple devices are over-priced and are functionally the same as their Windows counterpart. I get that for Apple products there’s a premium fee associated with being in the ecosystem– but I feel there’s no need to pay extra when it would only take a few minutes to setup an external hard drive. This will save you money.
Also, if you have multiple operating systems (OSes) in your house or your friends and workplace, this format is compatible with all the major modern OSes out there. Apple uses HFS+ by default, which is Apple-only. Windows uses NTFS mostly, and still supports the FAT32 format– both widely supported other systems with drawbacks.
Here’s a table to illustrate:
| OSX | Windows | Linux | Notes | |
|---|---|---|---|---|
| HFS+ | Yes | No | Yes | Windows can support HFS+ only through a paid app. |
| NTFS | No | Yes | Yes | OSX can only read from NTFS natively. Writing requires another paid app. |
| FAT32 | Yes | Yes | Yes | FAT32 is natively supported by OS X and Windows, but has limitations: 32GB partition limit, max 4GB file size, slower than NTFS and HFS+. |
| exFAT | Yes | Yes | Yes | exFAT is natively supported by OS X and Windows. |
It should be noted that Linux can support both HFS+ and exFAT with some free package updates, but natively supports NTFS and FAT32. This is why Linux and open source is amazing. Also, when I say Linux, I’m referring to the major distributions such as Ubuntu.
When not to use exFAT
There are many benefits to formatting a drive into exFAT, but there are some scenarios when it’s not a good choice.
- You only ever want to use the drive on Windows PCs, no Macs or Linux OSes, ever. Keep format in NTFS.
- You only ever want to use the drive on Macs, no Windows or Linux OSes, ever. Format to HFS+ (the default choice on the OS X section below.)
- You only ever want to use the drive with TVs and DVD/Blu-ray players. Format to FAT32.
- You like spending money on apps to read/write in other partitions/formats not native to your operating system.
Otherwise, the main uses are to use the external hard drive with many systems for both reading and writing.
Warning
Before doing anything else, make sure to plug the external hard drive into your operating system. Also be sure that there is nothing on the drive you wish to keep as you will be formatting the drive, thus erasing anything on it.
Formatting exFAT on OS X
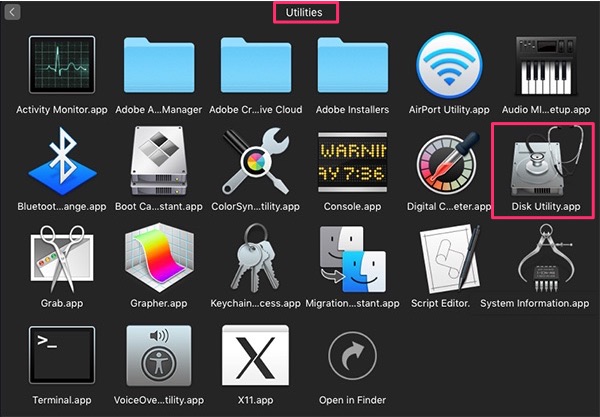
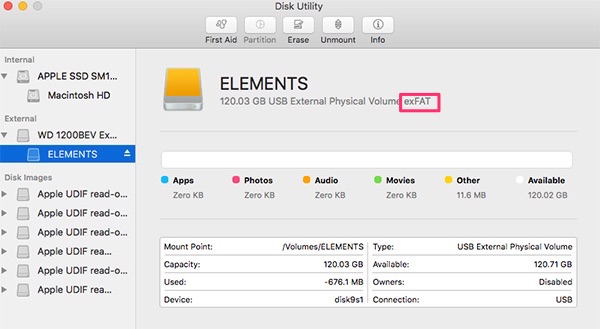
Under Utilities, open Disk Utility. The screenshot below are for the new Disk Utility in OS X (10.11) El Capitan .
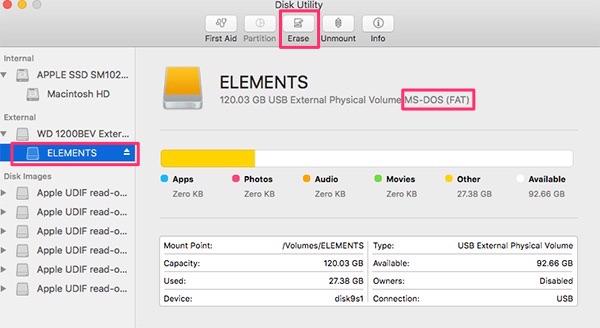
Find the external hard drive you’ve plugged in and select it on the left. Next click on Erase. As you can see, the drive I’m formatting is a Windows partition in FAT (technically FAT16).
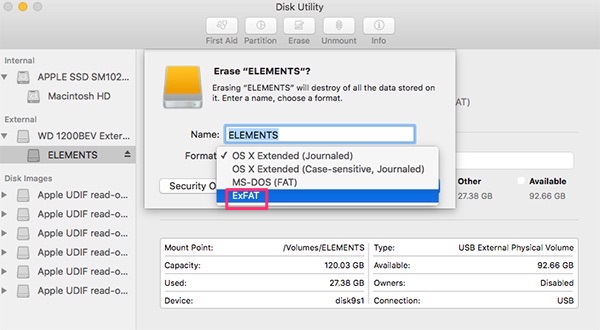
Next, choose ExFAT from the Format choices. By default OS X will want to format it is OS X Extended.
Let the formatting run its course, this may take a few seconds to a few minutes depending on how big the drive is.
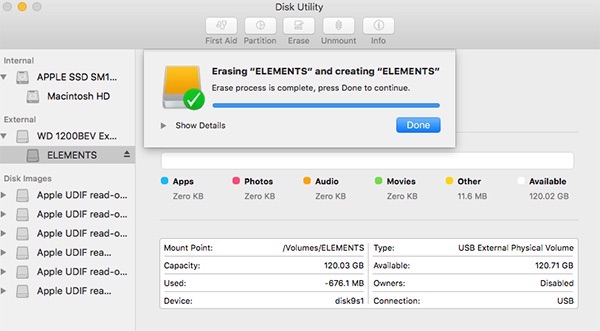
After it finishes formatting, the drive will be in exFAT format.
Formatting exFAT on Windows
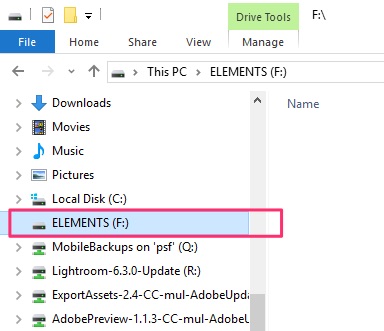
Open Windows Explorer and right-click on the drive you connected. Another small pop-up should come up.
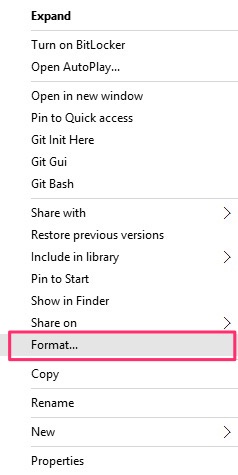
From the pop-up, select Format. A new window titled “Format” should come up.
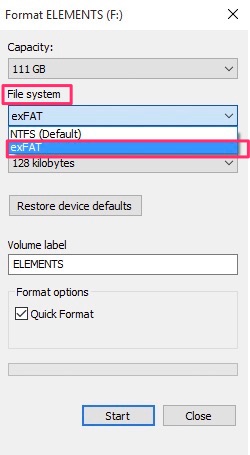
From the new window, under “File system”, select exFAT.
Formatting exFAT on Linux
If you are running a distro of Linux, there’s no need for me to walk you through formatting a drive since you are probably have the technical know how already. I just recommend the following packages to help manage your external drives.
sudo apt-get install gparted exfat-utils exfat-fuse